Gourmandise Cooking School’s New Pro Tips for the Best Fried Chicken
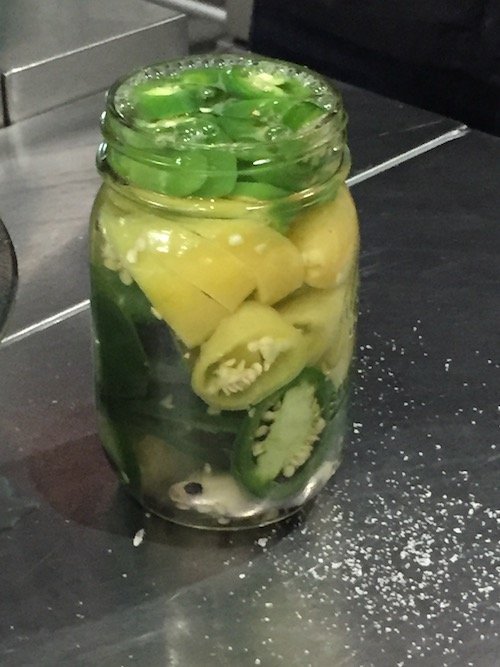
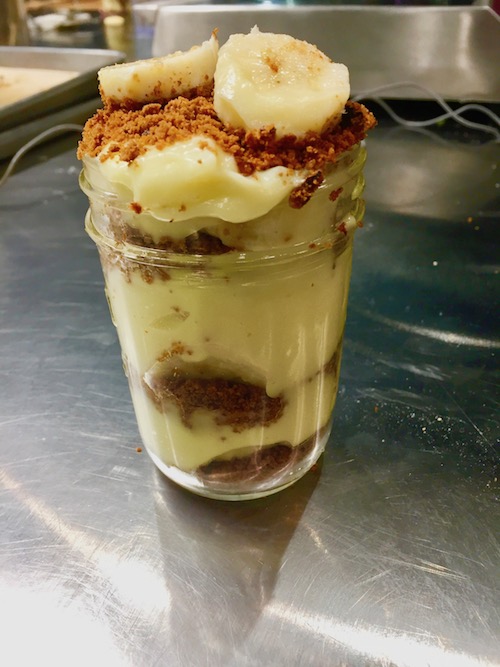
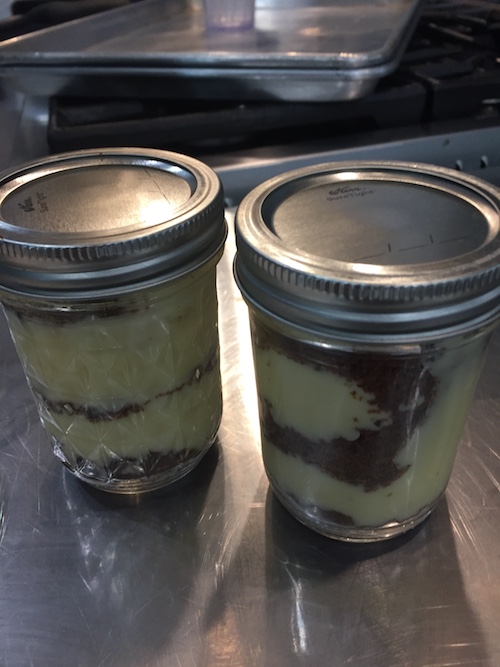
(Gerry Furth-Sides) The Gourmandise Cooking School with experienced instructor John Pitblado stayed focused on his professional tips, Fried Chicken class. A thorough if quick demonstration of cooking additional items to make a complete dinner. John’s well-tested recipe was augmented with tips for “finishing” the chicken once it was fried, and for ways to serve it, including the beautiful pickled peppers and banana pudding he swiftly prepared at the beginning of the class to taste and take home!
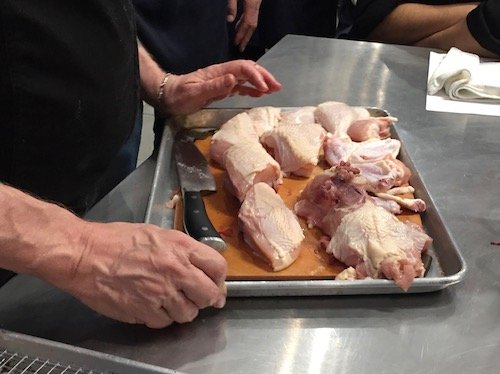
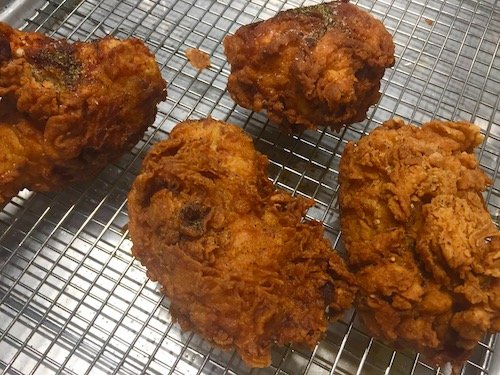
Highlights included detailed information on purchasing chicken and how to cut up therecommended whole one. Chef John also showed how to cut up, coat and fry the chicken at exactly the right time and temperature for that tantalizing extra crunch. He explained why finishing it off in a 200-degree oven ensured it is fully cooked. Videos of the whole chicken being cut up are below.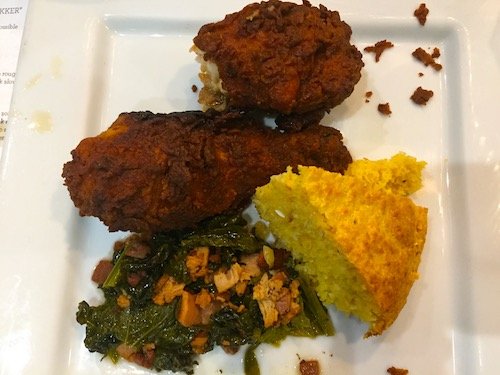
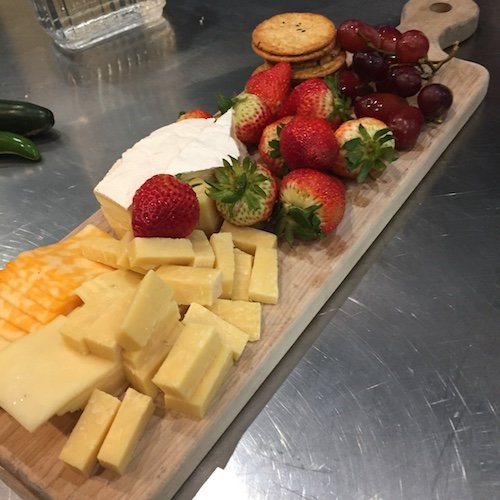
The commercial kitchen Gourmandise Cooking School class comes with all the convenience of a restaurant kitchen and dining experience, and starts with a class of wine in hand and cheese and cracker plate nearby. It is a BYOB.
For this class, my cooking student companion was Charisse, a former Trader Joe demo instructor, well versed in cooking fried chicken. I realized afterward that I met both these passionate cooks as demo directors, John Pitblado at Surfas.
 (1) Try to use a whole chicken. Cut the chicken at the joints. John demonstrated how to find the joint – not always possible at the exact right spot. Use the back for soup stock.
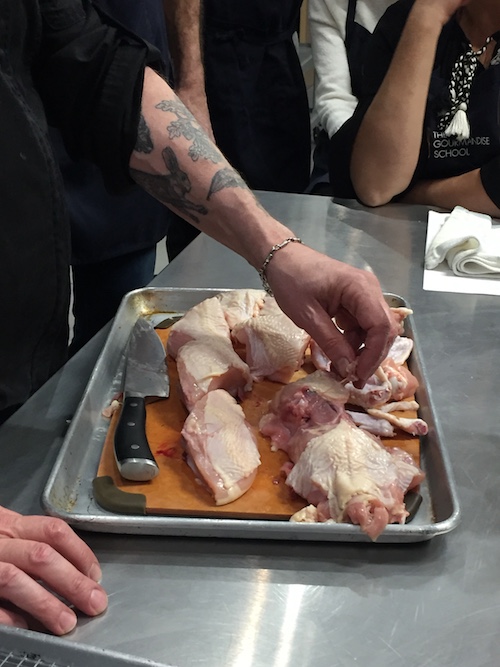
“Oysters” are two small, round pieces of dark meat on the back of poultry near the thigh, in the hollow on the dorsal side of the ilium bone. Some regard the “oyster meat” to be the most flavorful and tender part of the bird, while others dislike the taste and texture. John told us that King Louis XIV would just eat this part of the chicken and throw the rest away!
(2) Dip each piece before and after the egg mixture for extra crunch. Spices are right in the flour mixture, and you can experiment with variations of your own choosing – I use seasoned breadcrumbs or Japanese panko flour for an extra ethnic-based crunch.
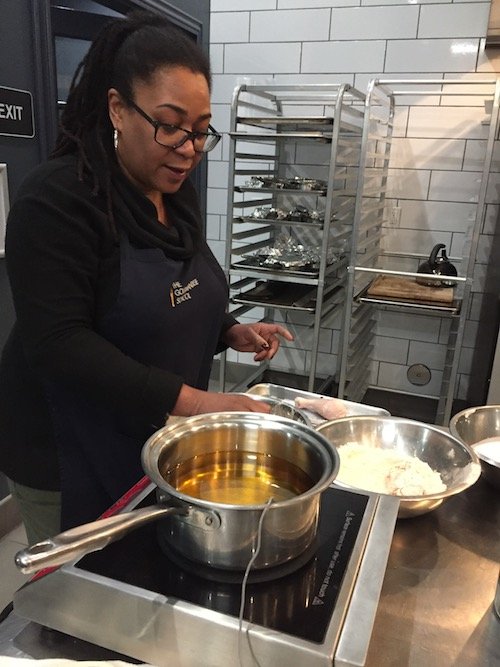
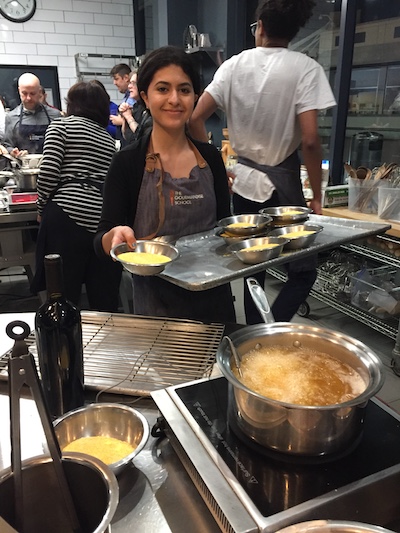
(3) Make sure your frying liquid is hot enough at 320 degrees. And use a liquid that has a high smoking point, such as grape seed oil. We learned to use this remarkable induction stove.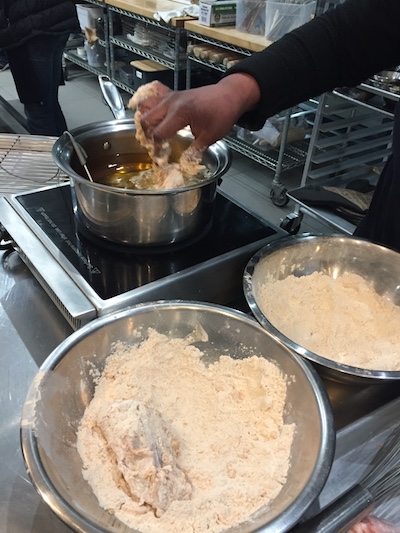
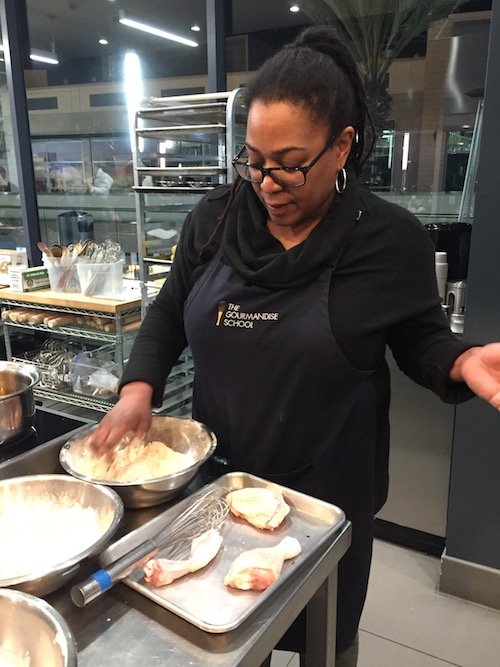
(4) Cook the chicken throughly, which should register on a thermometer at 165 degrees — at the bone we remembered afterward. John Pitlado suggested finishing the chicken off for ten minutes in a 200-degree oven after it is done. We found that we had to crisp and warm the chicken for twice this time.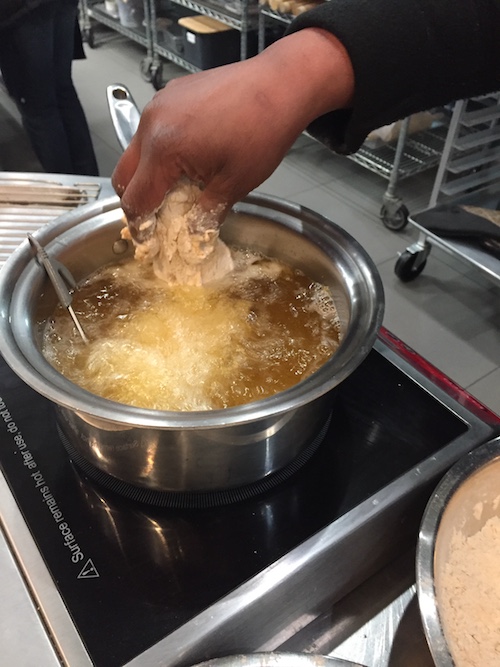
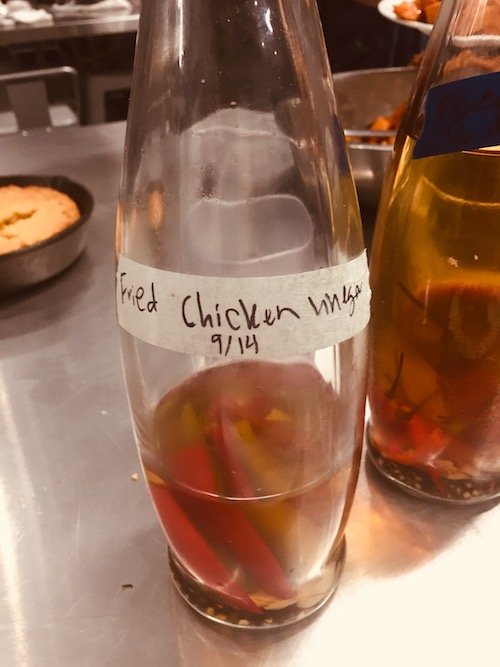
(5) Salt the fried chicken after it is done and/or use fried chicken vinegar to coax out contrasting flavors and textures of the chicken. The cooling rack is much more professional and practical than paper towels.
Extra tip: A Menu to go along with the fried chicken
Fried Chicken with Hot Pepper Vinegar Sauce
Glazed Sweet Potatoes
Southern Style Cornbread with Honey Butter
Long Cooked Mixed Greens with Bacon
Classic Banana Pudding
The earnest, helpful and friendly helpers! Malik and Claudina were the “frosting on the cake” for the class.
Students can also photograph and video the lesson. With all the work involved to cook in this classic manner — and we worked with measured ingredients thanks to the efficient sous chef, who also cleaned and allowed students to focus on the instructor demonstrating and actual cooking at his/her own station. Charisse thought that the class prices ($85 to $150) with students taking home the dinners they cooked was more than fair.

 The Gourmandise Cooking School in Santa Monica Place sends ahead detailed instructions for attire and BYOB. For more information on Gourmandise Cooking School, please visit the website here or phone 310-656-8800″ .

Co-owner-Founder, Chef Clémence Gossett (courtesy of Gourmandise Cooking School)
For more information on Gourmandise Cooking School, please see below and visit the website here.
- SOUTHERN FRIED CHICKEN
Yield: 10 pieces of chicken
Brine:
1 gallon3⁄4 cups
1
1⁄2 bunch1⁄2 bunch 1 head
1 Tbsp
1
water
coarse salt
bay leaf
fresh parsley
fresh thyme
garlic, cut in half
whole black peppercorns lemon, cut in half
Combine all the ingredients in a large pot. Bring to a boil. Remove from heat and refrigerate until cold. If desired, to speed up the process bring salt and remaining ingredients to a boil in one quart of water. When salt is dissolved, add 3 quarts cold water (one gallon brine total). Put chicken into non-reactive container large enough to hold it completely submerged in brine.
Chicken:
1 2 1⁄2 to 3 pound chicken
FOR DREDGING AND FRYING :
2 cups buttermilk
Kosher salt and freshly ground black pepper
Peanut or canola oil, for deep-frying (about 1 gallon for a 7 quart dutch oven)
FOR THE COATING: 3 cups
2 Tbsps
2 Tbsps
Directions:
Place Brine herbs and 2 gallons water in a large pot, cover, and bring to a boil. Boil for 1 minute, stirring to dissolve the salt. Remove from the heat and cool completely, then chill before using. The brine can be refrigerated for up to3 days.
www.TheGourmandiseSchool.com310.656.8800 – Receptionist@TheGourmandiseSchool.com
2 tsps
2 tsps
2 tsps
1⁄2 tsp
Ground fleur de sel or fine sea salt Rosemary and thyme sprigs for garnish
all-purpose flour garlic powder onion powder smoked paprika cayenne
kosher salt
freshly ground black pepper


Break chicken down into 10 pieces: 2 legs, 2 thighs, 4 breast quarters, and 2 wings. Pour the brine into a non- reactive container large enough to hold the chicken pieces, add the chicken, and refrigerate for 12 hours (no longer, or the chicken may become too salty).
Prepare to fry: Remove chicken from the brine (discard the brine) and rinse under cold water, removing any herbs or spices sticking to the skin. Pat dry with paper towels, or let air-dry. Let rest at room temperature for until it comes to room temperature, no more than 2 hours.
If you have two large pots (about 6 inches deep) and a lot of oil, you can cook the dark and white meat at the same time; if not, cook the dark meat first, then turn up the heat and cook the white meat. No matter what size pot you have, the oil should not come more than one-third of the way up the sides of the pot.
Fill the pot with at least 2 inches of peanut, canola or corn oil and heat to 320 ° F.
Prepare to dredge chicken: Set a cooling rack over a baking sheet. Line a second baking sheet with parchment paper. Meanwhile combine all the coating ingredients in a large bowl. Transfer half the coating to a second large bowl. Pour the buttermilk into a third bowl and season with salt and pepper. Set up a dipping station: the chicken pieces, one bowl of coating, the bowl of buttermilk, the second bowl of coating, and the parchment-lined baking sheet.
Just before frying, dip the chicken thighs into the first bowl of coating, turning to coat and patting off the excess; dip them into the buttermilk, allowing the excess to run back into the bowl; then dip them into the second bowl of coating. Transfer to the parchment-lined pan.
Carefully lower the thighs into the hot oil. Adjust the heat as necessary to return the oil to the proper temperature. Fry for 2 minutes, then carefully move the chicken pieces around in the oil and continue to fry, monitoring the oil temperature and turning the pieces as necessary for even cooking, for 11 to 12 minutes, until the chicken is a deep golden brown, cooked through, and very crisp.
Meanwhile, coat the chicken drumsticks and transfer to the parchment-lined baking sheet. Transfer the cooked thighs to the cooling rack skin side up and let rest while you fry the remaining chicken. (Putting the pieces skin side up will allow excess fat to drain, whereas leaving them skin side down could trap some of the fat.) Make sure that the oil is at the correct temperature, and cook the chicken drumsticks.
When the drumsticks are done, lean them meat side up against the thighs to drain, then sprinkle the chicken with fine sea salt.
Turn up the heat and heat the oil to 340 ° F. Meanwhile, coat the chicken breasts and wings. Carefully lower the chicken breasts into the hot oil and fry for 7 minutes, or until golden brown, cooked through, and crisp. Transfer to the rack, sprinkle with salt, and turn skin side up.
Cook the wings for 6 minutes, or until golden brown and cooked through. Transfer the wings to the rack and turn off the heat.
Arrange the chicken on a serving platter. Add the herb sprigs to the oil (which will still be hot) and let them cook and crisp for a few seconds, then arrange them over the chicken.
www.TheGourmandiseSchool.com310.656.8800 – Receptionist@TheGourmandiseSchool.com
PEPPER VINEGAR SAUCE
1
1 handful
1 Tbsp
4 cloves
White wine vinegar
glass bottle with cap or cork (about 10-12 oz)
tabasco, thai chili or mixed peppers of your choice (enough to fill your bottle) whole black peppercorns cracked
garlic, smashed
- Place enough vinegar to fill your bottle in a non-reactive pot. Bring to a simmer but do not boil.
- While vinegar is heating, set aside enough peppers to fill the bottle. You may remove the stems but it’s
not necessary.
- Make a small slit in each of the peppers with a knife to allow the vinegar to easily penetrate the peppers.
- Stuff all of the peppers garlic and peppercorns into bottle.
- Fill the bottle with the heated vinegar
- Because of its acidic nature it is not necessary to refrigerate. When the vinegar gets low top it off with
more. Lasts indefinitely.
 Gerry Furth-Sides
  Barbara Hansen
  Chef-owner Alain Cohen
  Roberta Deen
  Jose Martinez
  Nivedita Basu